How to Make an Album Poster in 5 Minutes (Step-by-Step)
You've got a favorite album. Maybe it's one you've been listening to on repeat for years, or a new release that just dropped and already feels like a classic. Either way, it deserves to be on your wall — not just in your playlist.
The good news: making a professional album poster no longer requires Photoshop skills, a design degree, or hours of your time. With the right tool, you can go from zero to a print-ready poster in under five minutes.
Here's exactly how to do it.
What You'll Need
Before we start, here's what you need:
- An album in mind (any artist, any era)
- A computer or phone with internet access
- 5 minutes — seriously, that's it
No design experience required. No software to install.
Step 1: Search for Your Album (30 seconds)
Head to PosterVibe and click Start Designing or go directly to the editor.
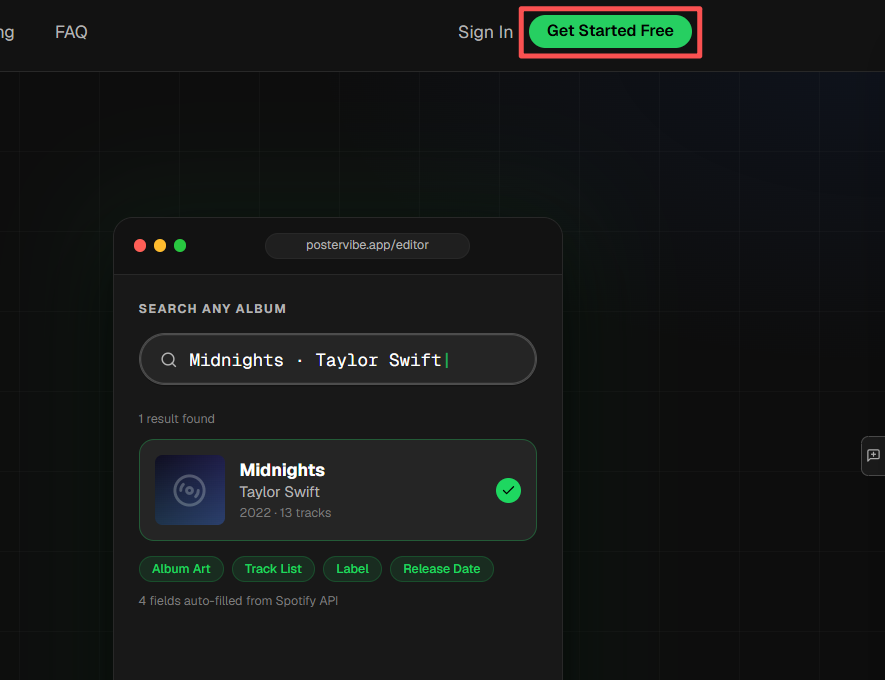
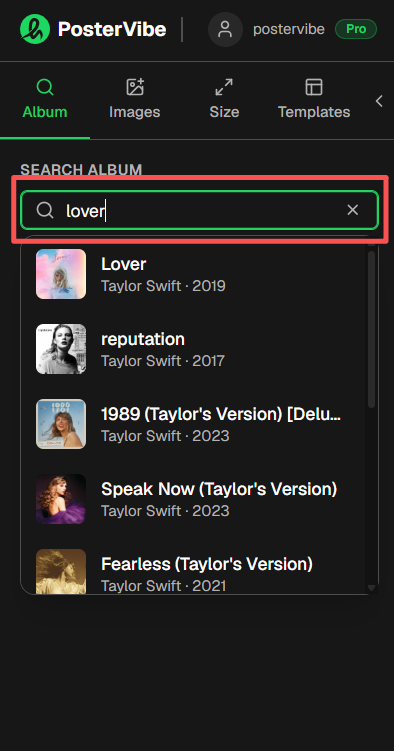
In the left panel, you'll see an album search bar. Type the album name, artist name, or even just a song title. PosterVibe pulls data directly from Spotify and MusicBrainz, so it covers virtually every album ever released — from mainstream pop to obscure jazz recordings from the 1960s.
Click on your album from the results and watch the magic happen:
- Album cover art is automatically loaded onto the canvas
- Artist name, album title, and release year are filled in
- The full tracklist is imported — every song, in order
- Label information is pulled in automatically
You don't need to type a single piece of information manually. It's all there instantly.
Pro tip: Can't find your album? Try searching by artist name first, then browse their discography.
Step 2: Choose a Template (60 seconds)
Now that your album data is loaded, it's time to pick a template. Click the Template tab in the left panel to browse the full library.
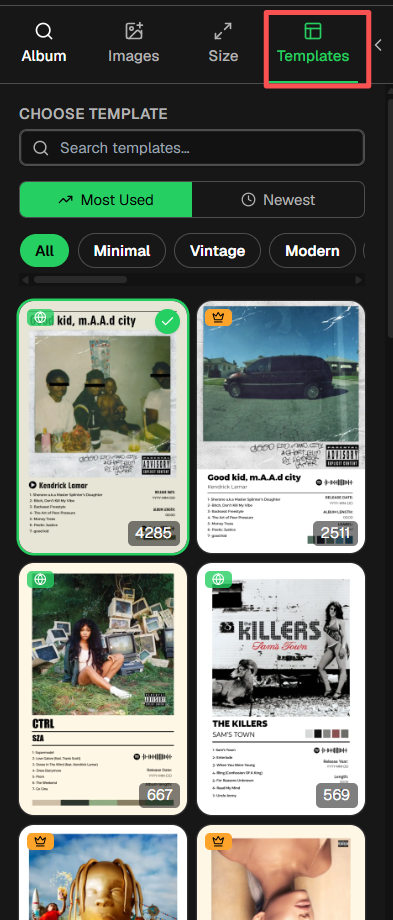
PosterVibe offers 100+ professionally designed templates organized by style:
- Minimal — clean, white backgrounds, typographic focus
- Dark & Atmospheric — moody tones that suit rock, electronic, and hip-hop
- Retro / Vintage — warm textures and classic type treatments for jazz, soul, and classic rock
- Modern & Bold — high-contrast layouts perfect for contemporary releases
How to choose the right template for your album:
Think about the album's mood. A dark ambient record probably shouldn't go on a bright, pastel template. A classic Motown album might feel right at home in a retro layout. Let the music guide the aesthetic.
Click any template to preview it instantly with your album's actual cover art and data loaded in. If it doesn't feel right, click another — there's no commitment until you export.
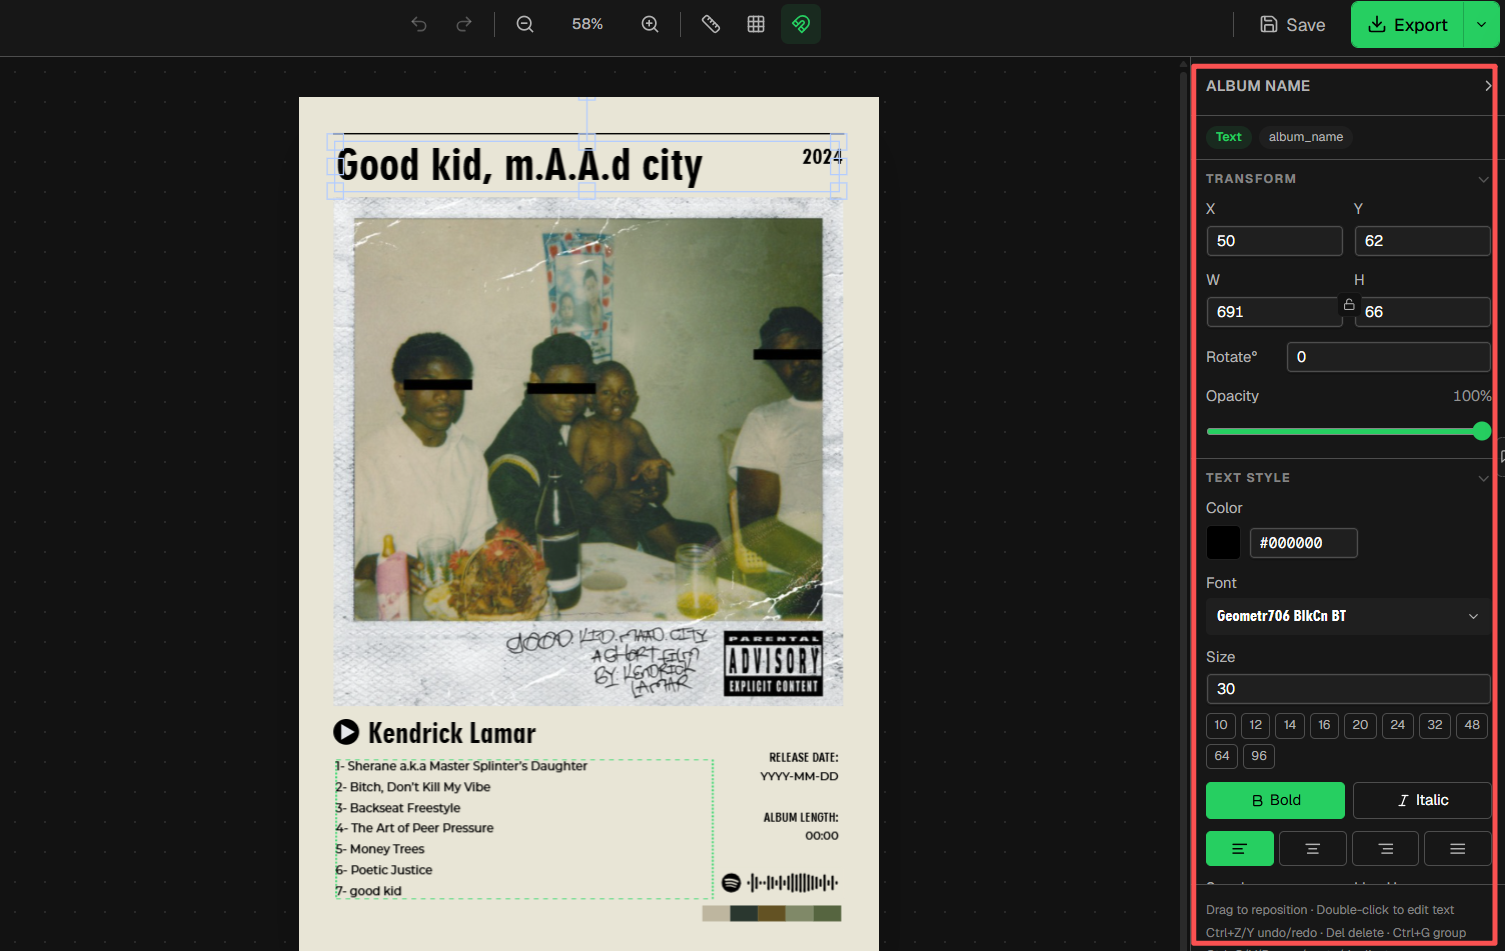
Step 3: Customize (2 minutes)
This is where you make it yours. The right panel gives you full control over every element on the canvas.
Adjust the Layout
Click on any element — the album title, artist name, tracklist, or cover art — to select it. You can:
- Move elements by dragging them
- Resize by dragging the corner handles
- Rotate using the rotation handle
Change Fonts and Colors
With any text element selected, the right panel shows font controls. You can change:
- Font family — choose from dozens of options
- Font size — make the artist name bigger, the tracklist smaller
- Color — click the color swatch to pick any color
- Alignment — left, center, or right
Change the Canvas Size
Planning to post this on Instagram? Frame it for your wall? The size panel lets you switch between standard formats instantly:
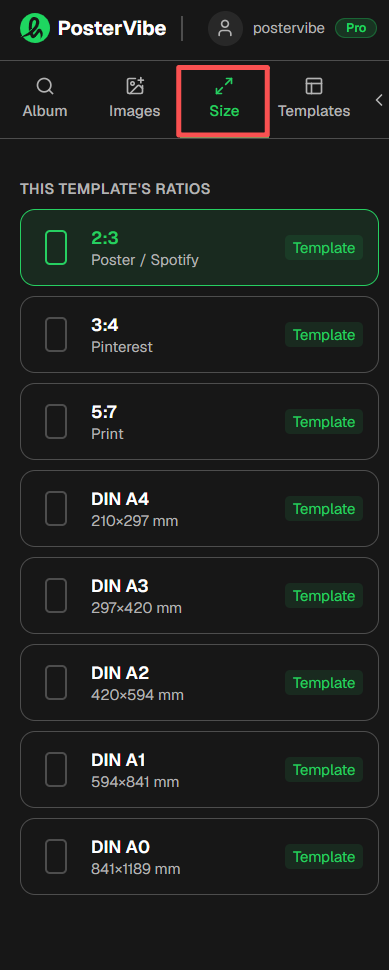
| Format | Best For |
|---|---|
| 2:3 (Classic Poster) | Wall prints, A2/A3 frames |
| 3:4 | Instagram feed posts |
| 1:1 (Square) | Profile pictures, CD-style |
| 9:16 | Instagram Stories, phone wallpaper |
| DIN A4 | A4 Print |
| DIN A3 | A3 Print |
| DIN A2 | A2 Print |
| DIN A1 | A1 Print |
| DIN A0 | A0 Print |
Switching sizes automatically rearranges the layout — you don't need to rebuild from scratch.
Fine-Tune the Details
A few finishing touches that make a big difference:
- Clip the album cover into a circle or rounded square for a modern look (Right panel → Mask Settings)
- Adjust the background color if the default doesn't complement your album art
- Edit the tracklist spacing if you have a particularly long or short album
Step 4: Export Your Poster (30 seconds)
Your poster is ready. Click the Export button in the top toolbar.
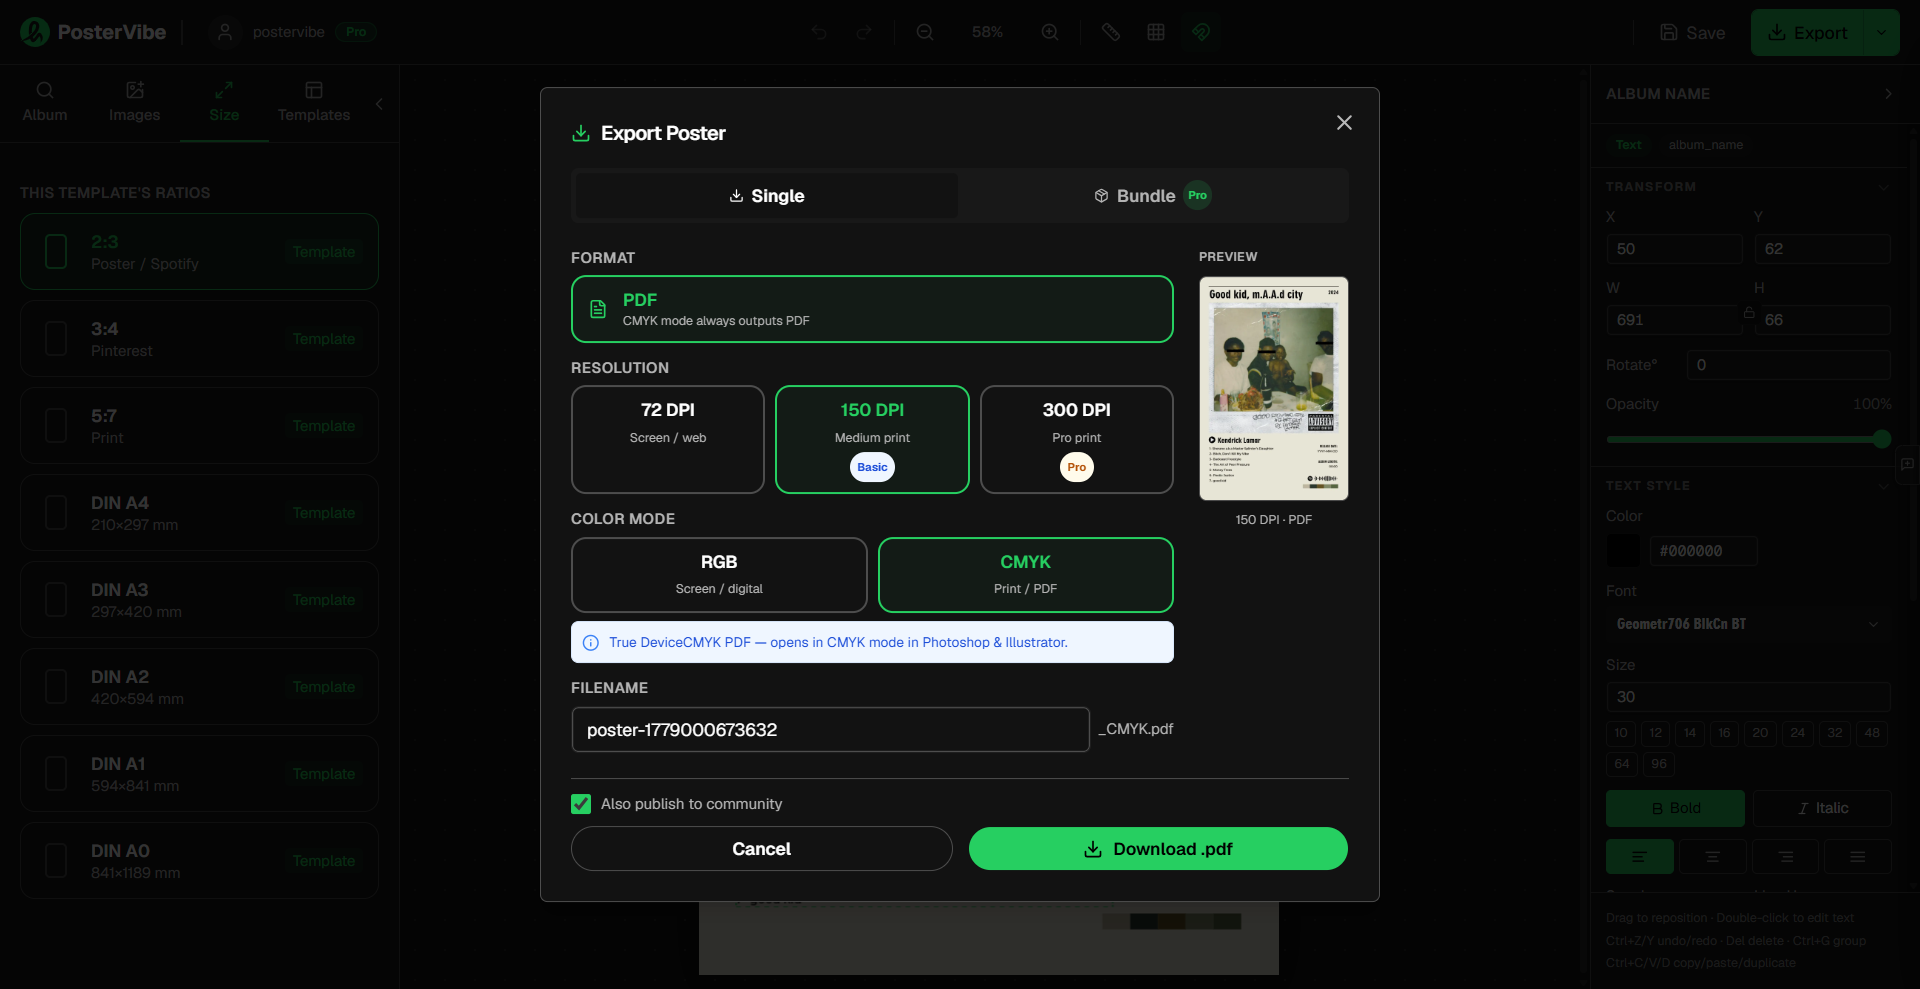
A dialog appears with your export options:
Format:
- PNG — best for digital use, social media, phone wallpapers
- JPEG — smaller file size, great for sharing online
- PDF — best for sending to a print shop
Resolution:
- 72 DPI — screen display, social media (free plan)
- 150 DPI — standard print quality (Basic plan)
- 300 DPI — professional print, large format (Pro plan)
Color Mode:
- RGB — Screen /digital
- CMYK — Print
For a poster you're going to hang on your wall, always choose PDF at 300 DPI. Print shops expect this format, and it ensures sharp text and crisp details even at large sizes.
Click Download and your file is ready.
Step 5: Print It (optional, but the best part)
Now that you have your file, here are your printing options:
Home printer: Fine for smaller sizes (A4/Letter). Use matte photo paper for better color accuracy.
Online print services: Sites like Printful, Snapfish, or your local equivalent accept PDF uploads and can print at A2, A1, or even larger. Turnaround is usually 2–5 days.
Local print shop: Walk in with your PDF on a USB drive. Most shops can print same-day. Tell them you want it on 170gsm matte paper for a clean, professional finish.
Common Questions
Do I need an account to use PosterVibe?
You can start designing without signing up. You'll need a free account to save your project and export your poster.
Can I use PosterVibe on my phone?
Yes. The editor works on mobile browsers, though a larger screen gives you more control over fine adjustments.
What if my album isn't in the database?
PosterVibe searches both Spotify and MusicBrainz. If your album still isn't found (rare for albums released after 1960), you can manually type the album information into the text fields on the canvas.
Can I make posters for multiple albums?
Absolutely. Free accounts support up to 10 saved projects. Basic and Pro plans allow 50 and unlimited projects respectively.
Will there be a watermark?
No watermarks — not on the free plan, not on paid plans. Your poster is clean and ready to print.
The Result
In under 5 minutes, you've gone from an idea to a print-ready, professional-quality album poster. No Photoshop. No design skills. No hours spent fiddling with alignment and font sizes.
That's the whole point of PosterVibe: the hard parts (sourcing album art, inputting metadata, laying out a design that actually looks good) are handled automatically. You just pick the album and choose what resonates.
Start designing your album poster →
Quick Recap
| Step | What You Do | Time |
|---|---|---|
| 1. Search | Type album name, data auto-fills | 30 sec |
| 2. Choose Template | Browse 100+ designs, click to apply | 60 sec |
| 3. Customize | Adjust fonts, colors, layout | 2 min |
| 4. Export | Pick format and DPI, download | 30 sec |
| Total | ~5 minutes |
Whether it's for your bedroom wall, a gift for a fellow music lover, or just a fun weekend project — your favorite album deserves a proper poster. Go make one.